Facial Recongition
In a previous post I covered how to build a very simple voice recognition model using guassian mixture models and some pretty neat audio preprocessing techniques. I thought that a follow up with facial recognition would be fun!
THe best facial recongition models are deep elarning models thag take advantage of hundreds or even thousands of photos of the target's face. These models tend to be convolutional neural networks (CNNs). You can even treat the parameters of the entworks in a bayesian fashion to get nice uncertainty estiamtes for your recognition model. I've given lectures on this subject and it's pretty cool. However, we'll take a much simpler modeling approach in this post.
Here we will go back before the days deep learning and discuss one of the ways that facial recongition was approached. Here is the blog overview:
- Setting Everything Up
- Capturing Video in Python
- Haarcascaades
- Facial Recognition Model
Setting Everything Up
In many of my posts I gloss over environment set up. THis isn't best practice, but I don't often end up using any libraries with major backward compatability issues. Numpy, for instance, is fairly reliable across versions. Here I thought it prudent to provide a little more information.
To get set up for this blog post, pelase create a new conda virtual environment and install the relevant packages using the commands below:
pip install opencv-contrib-python==4.0.0.21
pip install opencv-python==4.0.0.21
pip install Pillow==4.2.1
Capturing Video in Python
The basics of capturing video in python care faily simple. If you want to port this fucntionality to a web application with a python backend things get complicated fast. This tutorial is not meant to guide you into creating a production grade system for facial recongition, so forgive me if I just code only suitable for prototyping!
Let's start by importing the relevant packages. If you run this code on a raspberry pi I would add the line img = cv2.flip(img, -1) below the line ret, img = cap.read(). This will flip the image returned by the camera (a quirk of raspberry pi that I've run into is inverted image captures).
import os
import numpy as np
from PIL import Image
import cv2
Try running the code below. You should get a video showing the view from the default camera on your device. On my mac that is the front camera. On my raspberry pi it is the pi cam I attached.
# you may be prompted to give python permission
# to use your camera when runnign this code
cap = cv2.VideoCapture(0)

# video is just a set of image captures in
# very quick selection
# here we capture on "frame" per loop in
# our while statement
while True:
    #capture image/frame
    ret, img = cap.read()
    # grey scale the image
    gray = cv2.cvtColor(img, cv2.COLOR_BGR2GRAY)
    # show the gray image
    # to show the color image change the
    # argument gray to img
    cv2.imshow('video',gray)
    # check if the suer has pressed a key
    k = cv2.waitKey(30) & 0xff
    # if the user hits the escape key
    # exit the while loop
    if k == 27:
        break
# clean up the image capture
cap.release()
cv2.destroyAllWindows()
You should see something like the video below. The framerate isn't great...but this is python and we never set out to create a production grade application. I also apologize for the scruffy look. It's been a freezing cold winter and the beard keeps me warm.

Haarcascaades
Ok, before we do facial recongition we need to find faces to recogntize! Right now we just have a series of images (a video stream). Thart video could be of anything! So how do we find any faces in our images? Well, we could always go back to deep learning, but that is overkill for this particular problem. Here we will sue harcascaades.
Haar feature cascaade classifiers are an approach to iamge classification originally proposed by Paul Viola and Michael Jones back in 2001 in the paper "Rapid Object Detection using a Boosted Cascade of Simple Features". They are a kind of precursor to CNNs.
Haar features are derived from a very particualr kind of iamge filter. During model training we arrive at the optimal filters to use for our classification case (similar to filter selection of CNNs). Before Haar cascaades there was a time when human experts would hand pick filters!
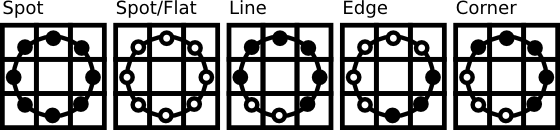
Here are a few examples of filters that might be used in a cascaade.

The features of our model are single values taken by subtracting the sum of the pixels under the white rectangle from the sum of the pixels under tha black rectangle.
Our filters will find interesting artifacts in our images. For instance, in the image below we seem to be finding all of the edges of a woman's body within an image. It has done this by finding out that certain filters allow us to detect the change in darkness when moving from a light background to the darker shades of the woman's jeans.
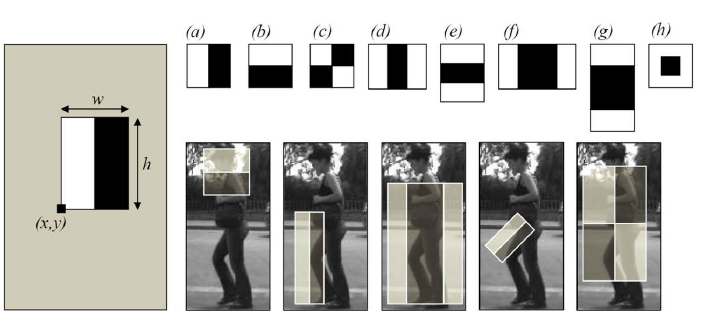
After passing MANY filters over the image, we can arrive at a holistic view of all of the edges of a particular subject in the image. For example, we seem to have isolated the basic scaffold of the face in the image below using harr filters.
Haar filters are not the most sophisticated means of edge/feature detection, but they get the job done and are very simple. Given enough positive and neagtive sampels to train on, we can find an efficient set of filters to let us do our detection task. One effective way of finding features is using a method like AdaBoost.
Okay, so we've covered harr features...what is a cascaade? Cascaading is a way of effieciently searching a alrge image for an object. First we pass a window across an image. Our model only 'sees' what is within the window.
When we see a new window we apply a coarse set of filters. If this first set of filters find nothing of interest we move on to the next window in the image. If the first set of filters find something interesting we apply a second set of finer filters. This is a "cascaade" of filters (hence the name).
Okay, so let's find some faces using haarcascaades! First, download a pre-trained facial recognition haarcascaade: haarcascaade repository. I will be using haarcascade_frontalface_default.xml in this tutorial. You can build your own haarcascaade if you want.
# import the pretrained cascaade
faceCascade = cv2.CascadeClassifier('./haarcascade_frontalface_default.xml')

cap = cv2.VideoCapture(0)

while True:
    ret, img = cap.read()
    gray = cv2.cvtColor(img, cv2.COLOR_BGR2GRAY)
    # detect the edges of the window the
    # cascaade detects the face in
    faces = faceCascade.detectMultiScale(
        gray,
        scaleFactor=1.2,
        minNeighbors=5,
        minSize=(20, 20)
    )
    # plot the dimensions of the window the
    # cascaade detected
    for (x,y,w,h) in faces:
        cv2.rectangle(img,(x,y),(x+w,y+h),(255,0,0),2)
        roi_gray = gray[y:y+h, x:x+w]
        roi_color = img[y:y+h, x:x+w]

    cv2.imshow('video',img)

    k = cv2.waitKey(30) & 0xff
    if k == 27: # press 'ESC' to quit
        break
cap.release()
cv2.destroyAllWindows()
You should get results like in the gif below.
Facial Recognition Model
There are many ways of doing facial recognition other than using deep learning. For instance, you could run principal components analysis(PCA) on the images and run logisitic regression on a reduced set of the components! Of course, this would no behave well if there are many variations on color, lighting, position, etc. You might try to handle the inherent variations in the image trains et by trainign some kind of kernel classifier, but this will not scale well to large training sets.
Today I'll stick with Local Binary Patterns Histograms (LBPH). This method is reasonably robust to noise, somewhat agnostic to the dimensions of the image, and works ok on very small training sets (as low as single digit counts of images).
This is nice because we may only have one image of the subject! For instance, I recently tried to create a facial recognition model ofr a cyber security colleague of mine (for an office prank). He has intentionally scoured his image from the internet as he is a huge security buff! I was only able to get a single devent image of him from a talk at a conference he gave years ago. I could synthesize more iamges using GANs and VAEs to suppliment my training set...instead I chsoe to use LBPH.
LBPH differs from many other methods in that it does not treat the image as a single vector (as the PCA Logistic regression would, for instance). LBPH takes it's roots from texture analysis and tries to compare every pixel to it's neightboring pixles. If the "center" pixel has an intensity greater than or equal to it's neighboring pixel then we label it as 1, if not we label it a 0. See the example below for 3x3 matrix of pixels.

We could write this formally as such:
$$ LBP(x_c, y_c) = \sum_{p=0}^{P-1}2^ps(i_p-i_c) $$
Where the subscript c denotes the central pixel and i denotes a pixel intensity. x and y are pixel coordinates. p are the neighboring pixels. s is a sign (not sine) function:
$$ s(x)= \begin{cases} 1, & \text{if } x\geq 0\\ 0, & \text{else} \end{cases} $$
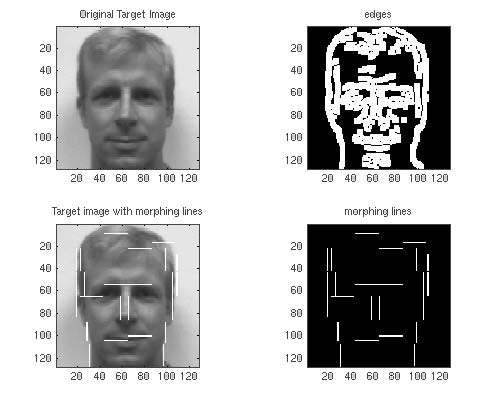
This can be made more robust to scaling issues by defining a variable neighborhood of pixels (I won't cover that here). This method is very sensitive to local structure and can help us find detailed sturctures in our image in a sinialr way to the filters in the har cascaade.
Now that we have some spatial features extracted by LNP, we need a way of comparing the patterns in one image to another to make predictions. We will use a method proposed by Ahonen, Hadid, and Pietikainen in "Face Recognition with Local Binary Patterns". We divide the image into sections and extract a histogram of each local region. We then concatenate these histograms to use when comparing images for "similarity". I'd really recommend reading the paper. It's a very cool technique and super simple.
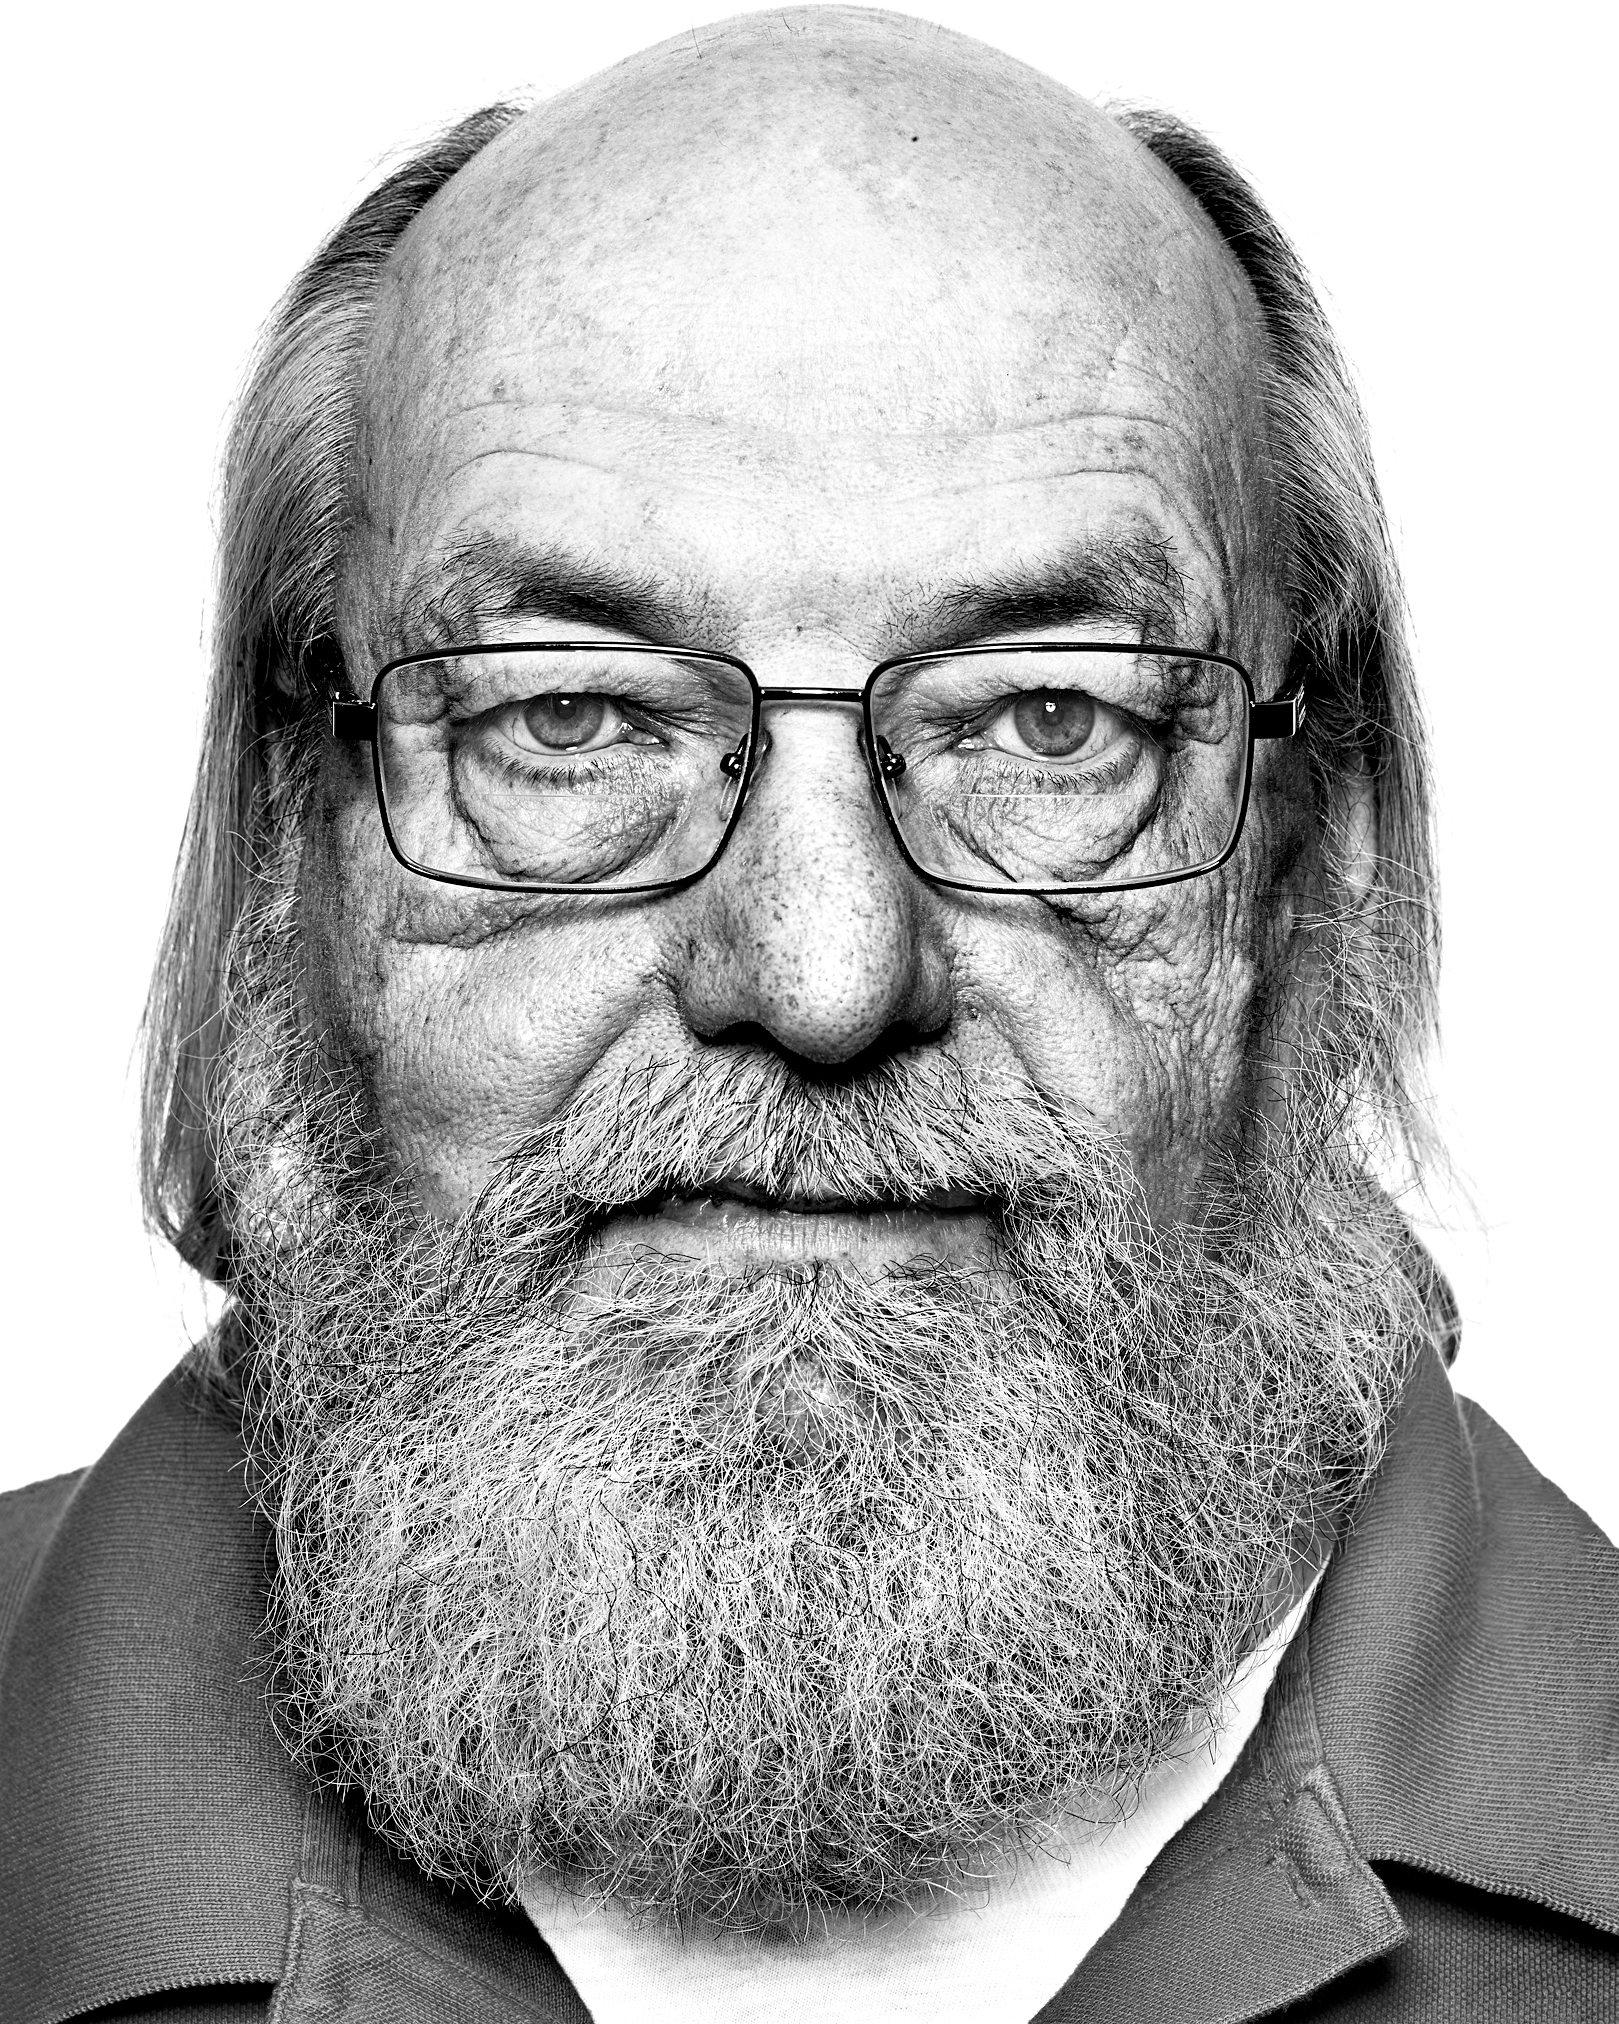
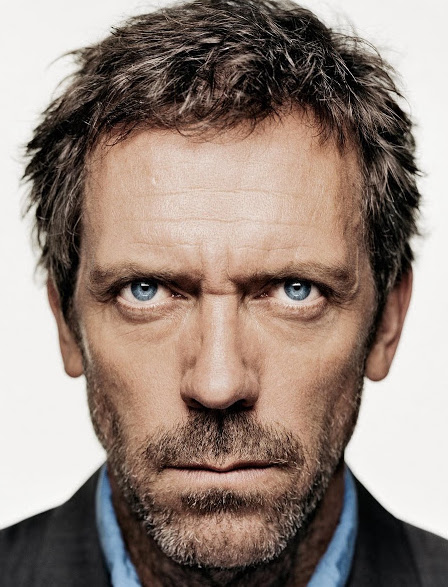
Okay, let's define our traing image set. In the same directory as your python script is saved, create a folder called /data. In this folder create a folder for every subject with the id number you want to assign to the subject (starting at 1). For example, I have four subjects and so I have four folders: 1, 2, 3, 4 for the respective subjects: James with no beard, James with beard, Ken, Hugh Laurie. Save your training image files in these folders.
The file structure should look soemthing like this:
.
├── face_recognition.py
└── data
    ├── 1
    |   └── img1.jpg
    ├── 2
    |   └── img2.jpg
    ├── 3
    |   └── img3.jpg
    └── 4
└── img4.jpg# function to get the images and label data
def getImagesAndLabels(path):
faceSamples=[]
ids = []
folderPaths = [os.path.join(path,f) for f in os.listdir(path)]
folderPaths = [folder for folder in folderPaths if '.DS' not in folder]
for folderPath in folderPaths:
id = int(folderPath.split("/")[-1])
imagePaths = [os.path.join(folderPath,f) for f in os.listdir(folderPath)]
imagePaths = [img for img in imagePaths if '.DS' not in img]
for imagePath in imagePaths:
PIL_img = Image.open(imagePath).convert('L') # convert it to grayscale
img_numpy = np.array(PIL_img,'uint8')
faces = detector.detectMultiScale(img_numpy)
for (x,y,w,h) in faces:
faceSamples.append(img_numpy[y:y+h,x:x+w])
ids.append(id)
return faceSamples, ids
Here are the training examples I will use. I'll be tough on the model and force it to use only one training sample per class. Hopefully you'll ahve more than just one sample!


We then create our face recognition mode and load in the haarcascade for the face detector. We also load in all of our training images and then train our LBPH model. We save the model in case we want to use it later.
recognizer = cv2.face.LBPHFaceRecognizer_create()
detector = cv2.CascadeClassifier("./haarcascade_frontalface_default.xml")

path = './data'
faces,ids = getImagesAndLabels(path)
recognizer.train(faces, np.array(ids))
recognizer.write('./trainer.yml')
Finally we use our model!
recognizer = cv2.face.LBPHFaceRecognizer_create()
recognizer.read('./trainer.yml')
cascadePath = "haarcascade_frontalface_default.xml"
faceCascade = cv2.CascadeClassifier(cascadePath);
font = cv2.FONT_HERSHEY_SIMPLEX

# names related to ids: example ==> Marcelo: id=1,  etc
names = ['None','James No Beard','James Beard', 'Ken', 'Hugh Laurie']

# Initialize and start realtime video capture
cam = cv2.VideoCapture(0)
cam.set(3, 640) # set video widht
cam.set(4, 480) # set video height

# Define min window size to be recognized as a face
minW = 0.1*cam.get(3)
minH = 0.1*cam.get(4)

while True:
    ret, img =cam.read()

    gray = cv2.cvtColor(img,cv2.COLOR_BGR2GRAY)

    faces = faceCascade.detectMultiScale(
        gray,
        scaleFactor = 1.2,
        minNeighbors = 5,
        minSize = (int(minW), int(minH)),
       )

    for(x,y,w,h) in faces:
        cv2.rectangle(img, (x,y), (x+w,y+h), (0,255,0), 2)
        i, confidence = recognizer.predict(gray[y:y+h,x:x+w])

        # Check if confidence is less them 100 ==> "0" is perfect match
        if (confidence <= 100 and confidence >= 50):
            i = "uncertain"
            confidence = "  {0}%".format(round(100 - confidence))
        elif (confidence <= 100):
            i = names[i]
            confidence = "  {0}%".format(round(100 - confidence))
        else:
            i = "unknown"
            confidence = "  {0}%".format(round(100 - confidence))

        cv2.putText(img, str(i), (x+5,y-5), font, 1, (255,255,255), 2)
        cv2.putText(img, str(confidence), (x+5,y+h-5), font, 1, (255,255,0), 1)

    cv2.imshow('camera',img)
    k = cv2.waitKey(10) & 0xff
    if k == 27:
        break

cam.release()
cv2.destroyAllWindows()
Here is what the final product should look like! We display a "confidence" number that represents (at a high level) the distance between the historgrams of the training images for the predicted class and the image we are trying to classify.
Parting Words
I hope you enjoyed this post! I promnise I'll shave before doing any more image recongition posts. If you want to take the concepts here even further, here are some suggestions:
- Preprocessing Steps
- Align faces to increase prediction accuracy
- Preprocessing light, color balance, etc. to increase prediction accuracy
- Add in a voice recognition model
- Replace Haarcascaade with deep learning model
- Replace LBPH with deep learning facial recognition model